Road Trip with the Laapers!

by: Olivia Laaper

Olivia at the Arches
photo credit: Jessica Laaper

Hi! I’m Olivia Laaper and I am writing this week’s middle school blog from the road with my family.  For 5 weeks, my family and I are on an adventure traveling across the country. From May 15th- June 20th, we will be visiting places like the Red Rock Amphitheater and Park, Rocky Mountain National Park, Arches National Park, The Grand Canyon, and even Death Valley.

On May 15th we set out and left at around 9 AM from Duxbury, MA headed to Indianapolis, Indiana. This was going to be the longest car ride of the trip and we were ready to get going. We spent one night in Indianapolis, then we were off to Whitchita, Kansas, which was another 10 hours…phew! Now you might ask, why Kansas? Well, my dad had a lot of business there, so we all took the opportunity to join him, spending two weeks there and getting to see what he does and hang out with some pretty cool scientists and graduate students.  

In between his work in Wichita, we are traveling all around to see other cool sites!  The first excursion we visited was the Red Rock Amphitheater and Park, it was really cool.  Our next adventure, we went to the Rocky Mountain National Park and got to see a lot of cool animals, like a moose, and elk and spent the day in the Rocky Mountain National Park. We then spent three days in Vail, Colorado, where we got to do some shopping (always fun) and went to a really great restaurant (yum!). 

Our latest adventure after Vail was Moab, Utah. There, we spent three days hiking the Arches National Park.  It was beautiful!! We got to Arches National park at around 5 AM, because it can get really busy, really fast. Since we got there so early we got to watch the sunset from one of the arches…gorgeous, we went on a couple of mile hikes, and went to many viewing sites that were breath-taking. 

The Arches at sunrise
photo credit: Jessica Laaper

This has been such an amazing trip and we aren’t even done yet. Next, we are going to the Grand Canyon.  I am so thankful I get to have this experience with my family.

The History of Unicorns

by: Lauren Trulby

Hello everyone, I’m Lauren and if you know me, you know I really like unicorns. This week I am blogging about the history behind unicorns and who they were created by. I have always found unicorns interesting and always thought the myth had to come from somewhere, I just never knew where. I have never known where they actually originated from and thought it would be a good thing to learn more about the subject.

Here’s what I found out. A Unicorn is a mythological animal resembling a horse with a single horn on its forehead. The unicorn appeared in early Mesopotamian artworks, and it also was referred to in the ancient myths of India and China. The unicorn was found in ancient seals of the Indus Valley Civilization and was also mentioned by the ancient Greeks in accounts of natural history by various writers, including Ctesias, Strabo, Pliny the Younger, Aelian and Cosmas Indicopleustes. The unicorn was not just randomly created or thought up, it was first mentioned in the Bible and it was found to be a strong, bold animal. It was said that if you drank from the unicorn horn then you were protected from all stomach problems. It was also similar to the Pegasus, used a lot in Greek mythology, and had the same meaning. When first created, they were known to have a purple neck, blue eyes, and white on the remainder of the body. As it evolved it became more pink. Unicorns now are more of a consumer product and not too much a sacred or special animal anymore. Finally, unicorns were first written about as early as 165 b.c. in the Bible.

In conclusion, unicorns are very interesting creatures that have been around for thousands of years, evolving into different things for different places in the world. To this day unicorns are reported to be seen in forests and other places but no actual proof of their existence presently. No one really knows where they came from, there had to have been a reason, but that is unknown.

I hope you learned something by reading this and I hope you enjoyed it! Thank you

White Water Rafting Fun!

By: Marley Hamilton

 I am so excited! The middle school trip is right around the corner! On the trip we will be doing all kinds of fun things like white water river rafting, zip lining, kayaking, and tree canopy climbing. The activity I am most excited for is white water river rafting. Today I would like to share with you my experience white water river rafting last summer in Maine.

          So, last summer my family and I were in Maine at a place called Moosehead Lake. We woke up first thing in the morning, got in our car and drove to the white water rafting site, where we hopped on a bus and drove out to the river. First, we brought our raft down to the water (which wasn’t close by the way) where the instructors taught us how to steer the boat. Then we pushed our raft into the river and hopped in. 

It was so much fun!  While rafting, we were able to jump off the raft and swim in small rapids. That was my favorite part. Then we stopped off at a lunch spot and had the best lunch in my life which included all carbs, yum!  It was perfect and filling after a long morning on the water. After lunch, we hopped back in our raft and floated all the way back to the campground, where we pulled our boat out of the water and drove back home.

          That trip was one of my favorite trips ever all because of the white water river rafting. It was surprisingly not scary and just exciting. It was such a good experience and I can’t wait to experience it again, this time with my classmates on the middle school trip this month.

The Art of Karate

by: Maddie Poppish

Hi guys! Maddie here! Today I am going to talk to you about karate, which I have been doing for over 2 years now. I will go over the history of karate and how my karate system works.

     Although karate evolved in East Asia over a period of centuries, it only became systematized 200 years ago, in the 17th century. It started in Okinawa, when a ban on weapons was placed. People had to figure out a way to fight with their hands, and that is when karate developed. Karate actually means “empty handed” in Japanese. It was introduced to Japan in 1920, and soon karate schools popped up around the world.

     Now that the basic history of karate is covered, I will review what my system teaches and how that differs from other karate systems/schools. In my system, you start out as a white belt. As you progress on through this belt, you earn stripes. A stripe symbolizes growth in the knowledge of karate and the understanding of certain kicks, strikes, and defense moves you will need to advance to the next color belt. The greatest amount of stripes you can earn is three stripes. The number of stripes you have is said like this; (number of stripes) review (color belt). For example, if a karate student is a second review blue belt, they are a blue belt with two stripes. If you have no stripes, you are a solid belt, not a review. 

     After you have proven yourself, you get a new belt with a different color and a new go that matches the belt color. My system has belts in this order; white belt, blue belt, brown belt, red belt, and black belt. The red belt is new in our system. Before that, you would go directly from brown belt to black belt. Now, the system has split the knowledge that you learned at brown belt into two groups. The first group is the new curriculum learned at brown belt, and the second group is the new curriculum now learned at red belt.

     Here is the cool stuff you learn at each belt!

White belt: Since this is the first building block, you only learn basic kicks, strikes, and blocks. When you are at solid or first review white belt, you learn how to block a strike and hit back with another strike. When you are at second or third review, you learn how to block and strike back with two strikes, not just one.

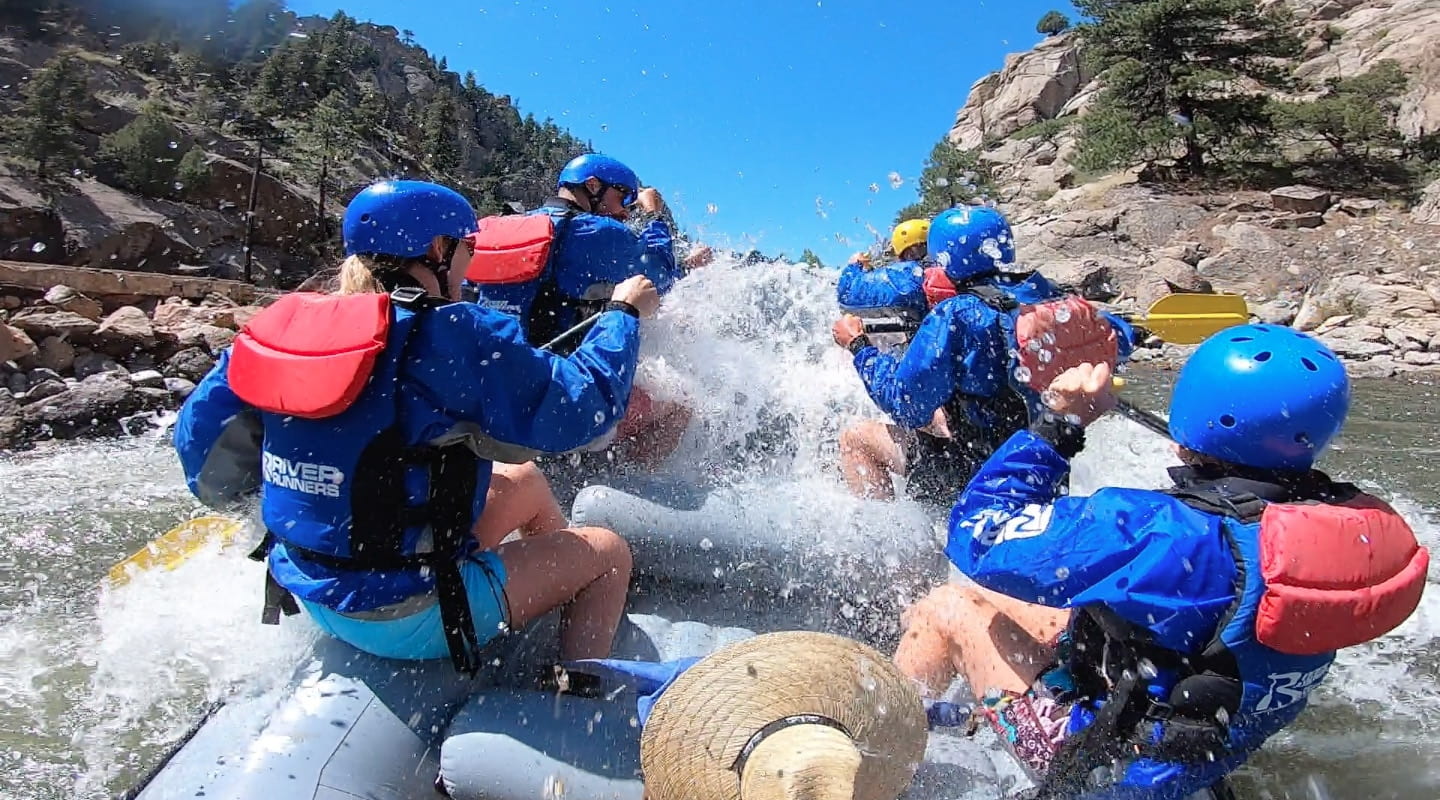
Blue belt: This belt is really fun! You are introduced to sparring, which means blocking and striking with an opponent. Basically, it means fighting an opponent by punching and blocking. You wear headgear, arm pads, and a mouth guard when sparring someone for protection. Tactics are also introduced at this level, which is a group of moves used to take someone down. The group of tactics you learn at blue belt are called tiger tactics. I will get into the other groups of tactics later on. There are twelve tiger tactics. You learn 1-4 at solid blue belt, 5-8 at first review, and 9-12 at second review. These tactics are known as “righties” because your opponent is striking at you with their right hand. Besides this cool stuff, you start to use kicking and punching pads with an opponent. This is when an opponent holds up a pad for you to punch or kick.

Brown belt: A lot of stuff is introduced at brown belt! First off, you learn “leftie” tactics, which you would use if your opponent was attacking with their left hand. Exactly like in blue belt, you learn lefties 1-4 at solid brown, 5-8 at first review brown, and 9-12 at second review brown. Another thing that you learn at brown belt is bo staff sparring! This is when you spar with a long foam stick, known as a bo staff. You learn how to strike an opponent with a bo staff and how to block when your opponent tries to strike you. You also learn open-handed strikes, which is when you use an open hand instead of a fist. Lastly, you start using kicks in sparring, learn new kicks like hook kicks, bow kicks, and roundhouse kicks, and start using light touch contact in sparring. In blue belt, you do not use touch contact or kicks in sparring. You get leg guards for kicking in sparring and special shoes that make it easier to pivot when kicking in brown.

     Because the red belt is relatively new, I do not know the curriculum. As for black belt, I do not know much, besides the fact that there are multiple degrees of black belt. For example, you start off as a first degree, then get three yellow stripes, and then excel to a second degree black belt. There are 10 degrees of black belt. One thing I do know about black is that you learn new forms of tactics! There are leopard tactics, crane tactics, snake tactics, and dragon tactics. Masters learn monkey tactics, which are the craziest and most challenging of the tactic groups.

     Different systems may have different color belts. For example, one system may have green and yellow belts, while another may have neither of these, but does have red and blue belts. The curriculum and moves learned in one karate system may or may not be taught in another different system.

And that’s karate! Hope this blog was fun to read!

Save the Bengal Tigers

by: Klara Geder

 My name is Klara Geder, and this week I’m the blogger again! I’ve decided to do this blog on my favorite animal, the bengal tiger. They’re mainly my favorite animal because they’re my favorite animal to draw.

        Bengal tigers are most commonly found in India living in mangrove habitats. They’re from the Panthera Tigris subspecies, and are Native to India. They’re about 3.6 feet tall at shoulder height, 7.9 to 10 feet long, and a male Bengal tiger weighs 490 pounds while a female tiger weighs 310 years. Their Lifespan range is about 8-10 years in the wild, but between 14 and 16 years in captivity. 

        Bengal tigers are carnivores, and they have a very large variety of foods they eat, ranging from beetles, to elephant calves. Their favorite foods are typically 20kg, or bigger including pigs, cows, horses, Buffalo, moose, bears, moose, and deer species meaning they can devour up to 100 pounds in one sitting.

        Besides being such beautiful animals, their numbers are dwindling due to poaching and habitat loss. Tigers are poached because of their threat to people, and for their fur. There are only about 3,900 tigers left in the wild.  These few left are in a crisis with a declining population. They might only be seen in zoos, because it’s estimated that as soon as 2030, tigers will be extinct in the wild.

        Thank you for reading my blog about bengal tigers! If you want to donate to help save these creatures from extinction click here

Learning Sign Language

By: Grace McTighe-Tassinari

Hello everyone, this week I want to talk to you about why American Sign Language is important to me and why I am passionate about learning it. 

I have known the entire alphabet in ASL since the third grade. I didn’t really develop a real interest in it until about a year ago, when we were in quarantine and I learned how to sign “A Thousand Years” by Christina Perri. Once I learned that song, I was very interested in learning more about ASL full words and phrasing and learning new songs. So far, I have learned more than 16 songs, I know many different phrases, and I learned numbers 1-10. 

I am passionate about ASL because it is not a language many people know and I think it is really cool to be able to speak without using your mouth. It takes me about 40 minutes to learn a song I have heard and then learn the signs to it. If it is a song I have never heard before, I try to memorize the song first so I can then learn the signs.  That usually takes around two hours. I practice almost every night and I go over the songs I know and some of the signs I know so I don’t forget the signs.  It’s very important to keep practicing so that you have muscle memory and you become more fluent.

Sign Language dates all the way back to a man named Pedro Ponce de León (1520-1584). He was a Spanish Benedictine monk known as the “first teacher for the deaf”.   Ponce de Leon established a school for the deaf at the San Salvador Monastery in Oña.  His work with deaf children focused on helping them learn how to speak language audibly.  He also instructed them in writing and simple gestures.  Sign Language is important because it allows deaf people to communicate with other people and tell them what they want or how they are feeling.  It also helps them feel included in conversations and public presentations. 

I am on my way to being fluent in Sign Language and I hope that one day I can be a professional Sign Language interpreter.

The World of Dance

By: Diana Zani

Hello my name is Diana, and I would like to inform you about the many different forms of dance.  The most common forms of dance that are seen in today’s society are hip-hop and ballet, but there are many more as well.  These include tap, contemporary, lyrical, and ballroom. In addition, each region of the world has its own dance styles such as Irish step, African dance, the salsa, and Chinese folk dances.  While there are many styles, I’m going to focus on tap, hip-hop, and ballet as I have trained in these styles.

Tap dance was invented in the United States in the early 20th century by combining European clog dancing and West African step dancing.  It gained popularity through movies featuring Shirly Temple, Fred Astiare, Ginger Rogers, and Gene Kelly.  The shoe differs from typical leather dance shoes, as it has metal plates screwed into the heel and ball of the foot to accentuate the sound.  You can see modern day tap in movies like “LaLa Land” and Billy Elloit.

Hip Hop evolved from African dance into what is one of the most popular styles in today’s society.  Early forms of the style are traced back to the southern Bronx of the late 1970s.  Some defining features of the style are its sharp motions and low positions.  Unlike tap and ballet, hip hop can be done anywhere.  You can see hip hop in many places including TV, music videos, movies, and street dancing.

Ballet was one of the first styles of traditional dance, and originated in Italy during the Renaissance.  It moved to France in the 16th century with the marriage of Catherine Medici to King Henry II of France.  The Russians took the lead next and created some of the most famous ballets such as “Swan Lake” and “The Nutcracker”.  Ballet has two different kinds of shoes: Ballet slippers used by dancers under the age of 12 and professional warming up, as well as pointe shoes used by more experienced dancers and professionals.  The base of a pointe shoe is made of a cardboard platform, which supports a dancer’s foot while on high releve (aka : on your toes).  

As I covered above, there are many different styles of dance, and still this barely begins to scratch the surface of the world of dance.  While there are many differences among dance styles, they are all united by music and body movement.  I hope you enjoyed reading my blog.  I myself learned a lot while writing it and I hope you did too.

Podcasting Equipment

By: Finn Foley

Hey guys I am going to tell you about a few good audio interfaces to choose from whether it’s for Podcasting, Youtube, Songs, or anything else that supports an XLR cable.

I have a Scarlett 2i2 3rd Gen Pre Amp and it works pretty well but I wish I knew more about audio interfaces before I bought it because the Scarlett does not have controls for an audio mixer, so your control with your microphone is very limited. Yes, it’s cheap for an interface but I think you could get something better for a little more money. I did a little research and found the GoXLR. The GoKLR has everything you need in a mixer and audio interface. There are even certain buttons to change your voice and block out swears. I wish I knew about the GoXLR before I bought the Scarlet. Yes, the GoXLR might be pricey at $400 but I do think this will be the best choice for anyone wanting to start a podcast. 

Another audio interface I’ve researched is the RODECaster pro. This is also a good choice for an interface/mixer because it has most things the KLR has and it even works better If you pair it with a RODE microphone. The RODECaster pro also has set configurations and places them on your mic for you, this creates the best sound quality. 

In conclusion on mixers, I would not recommend a Scarlett 2i2, but if your budget is that limited you can get one because it’s ok to start there. However, if you can expand your budget by a couple of 100 dollars, then I recommend a GoXLR or a RODECaster pro, especially if you have a Rode microphone.

For your Audio Interface/Mixer you will need a good microphone to capture your voice and produce clear and crisp sound to the world. A good recommendation for a mic is the Shure SM7B. This is a dynamic microphone that uses an XLR cable so you can use it with your audio interface. The Shure SM7B is a perfect choice for basically any audio interface. It comes with a built-in pop filter so it can reduce background noise and annoying sounds like lip-smacking. It also comes with an even bigger option to move up to so you can be sure there is no background noise. Another option for a mic is the Electrovoice RE20. This is a great microphone for the RODECaster pro because it is a Rode microphone so it has a preset for the best settings for that brand microphone. The RE20 also has great sound quality, perfect for anything you put in its way. 

So, there you go. That’s my advice to you on how to build a good quality setup for podcasting or anything you want to do involving people hearing you through a microphone. I wrote this blog to pass on the info I wish I new before I made my purchase. I hope this helps you to achieve the best professional sound for your buck.

Environmentally friendly?

A to-do list everyone should follow.

by Ava McNeil

Global warming has become an increasing problem for us. Many of the things we do on a daily basis are harmful to the environment. You could be causing damage without even knowing it! How can we stop that though? Keep reading to find out.

Wasting food is a serious problem. You don’t realize just how much food you’re wasting every day. What can we do to alleviate this problem? Stop over-buying at the grocery store. When you buy all that food and don’t use it, you end up throwing it out which is not something you want to do. You can also freeze fruits and veggies that you aren’t going to use before the turn. This way, you can use them later. Lastly, if you have leftover food or food scraps consider starting a compost. The compost can also act as fertilizer!

Avoid using single use plastics! Single-use plastics are unquestionably bad for the environment. Instead, buy a water filter for your sink so that you don’t have to buy bottled water. Use reusable water bottles to bring to school and work. You should also bring reusable bags to stores. Don’t use produce bags at grocery stores instead order small cloth or mesh bags for your produce. Do not use straws! At restaurants ask to have your drink without a straw or, if possible, get a paper or metal straw. 

  Make some swaps in your bathroom. Instead of using body wash out of a bottle, us body wash bars. Don’t let your products go to waste! Make sure you’re getting everything you can out of them and if the product isn’t helpful to you, find other ways to use it. Instead of single-use cotton rounds, you should use reusable ones. They’re more efficient and can be easily washed. 

Make some kitchen swaps too. Try not to use too many paper towels. Instead, use dish towels. Stop using plastic wrap and use beeswax wraps as an alternative. Use cloth napkins instead of paper napkins. Go to local farm markets and buy local meat. Factory meat isn’t as good for you and will contribute to global warming. You can also start a garden and even use your compost to sustain it. This way, you can grow your own fruits and vegetables. Consider Thrifting homeware and appliances instead of buying new things.

Shop consciously. You can support companies with environmentally friendly practices. Buy products that have organic ingredients. Encourage small and local businesses instead of buying from big companies. 

There are simple every-day things that you should be conscious of. Try not to use unnecessary amounts of water in your house. You shouldn’t leave any lights on in your house unless absolutely necessary. Separate your trash and recycling! I can not stress this enough. So many things that can be recycled are thrown into the trash because people can’t be bothered to throw it into recycling. All that recycling will end up in landfills! Once your device is done charging, unplug it. Leaving it plugged in is not only bad for your device, but it also creates phantom electricity. This means that all the electricity that is going into your device is going to be wasted.

Even if these solutions won’t do much individually, if we all start looking for alternative ways to go about our days, we can make a big difference. Hopefully our community can become more environmentally friendly and we can be an example to others.

The Love of Archery

By Olivia Laaper

Hello, my name is Olivia, I am very interested in archery. This sport is great, for exercise, patience, strength, control, and self-confidence. Today, I would like to talk to you about the three types of bows used in the sport of archery, the Compound, Recurve, and Longbow. 

I got involved in  archery in 5th grade. When I started out I used a Compound bow, and that is the bow I use to this day. The first time I ever used a bow was at summer camp. I didn’t necessarily like it, but after a few years and another try with the bow I really enjoyed it. The most commonly used bow is the recurve bow, this bow has two limbs, these two limbs are facing away from the archer. The fastest types of bows are Mathews TX-5, Hoyt Helix Turbo, and Xpedition MX-15. The main parts of every bow is the string and the main bow. The parts of the recurve bow are, the middle part of the recurve bow called the riser and the top and bottom parts known as the limbs. The main parts of the compound bow are the cams which are located on the top and bottom, the middle part called the riser, the cable slide and cable rod. There is evidence that archery was used 71,000 years ago, but the bows and arrows were usually used for hunting and later war. 

There are many types of bows and parts. Archery can teach someone about focus and corranating. I hope this blog inspires you to try it someday! If you are looking for more information on how to shoot a recurve bow, here is a video demonstrating use of the Olympic Recurve Bow. Enjoy!